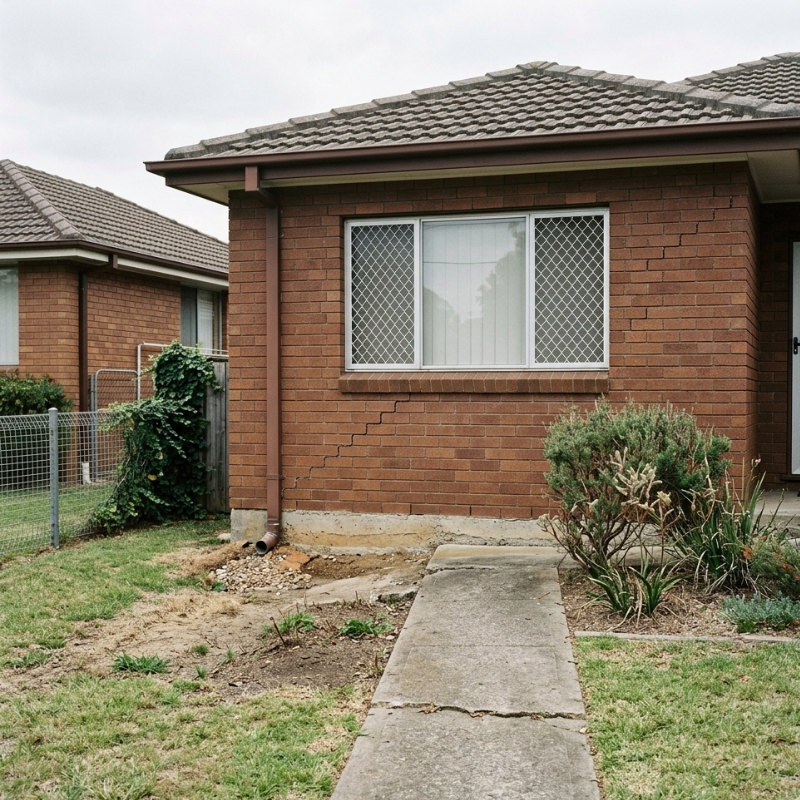
If you’ve noticed new cracks, doors that suddenly stick, or floors that feel like they’re drifting out of level, it’s normal to wonder what “underpinning” actually means in real life. Not the glossy definition—what happens on-site, who does what, what the sequence looks like, and why the work is done in stages instead of all at once.
This guide walks through what most homeowners in Australia can expect from start to finish: the investigation and design phase, common methods, what the site looks and sounds like during the works, and what comes next after the structure is stabilised.
First: what underpinning is (in plain English)
Underpinning is a way of improving how a house is supported by the ground. Instead of relying only on the original footings (which may be shallow, built to older standards, or affected by soil movement), underpinning introduces new support points or deeper support elements that transfer loads more reliably.
In Australia, underpinning is often discussed alongside foundation movement, reactive clay soils, subsidence, settlement, water ingress, drainage issues, or changes around the home (like trees, landscaping, new paving, or plumbing leaks). The goal is typically stabilisation—stopping ongoing movement—so that repairs to finishes (plaster, paint, cornices, tiling) have a better chance of lasting.
A quick reality check about outcomes
A common misconception is that underpinning automatically “makes the house perfect again”. Sometimes re-levelling can be part of the plan, but often the primary objective is to stabilise the structure and reduce future movement. Cosmetic repairs usually come after, and timing matters.
The typical stages homeowners go through
Most underpinning projects follow a predictable sequence, even though every site is different.
Stage 1: symptoms, documentation, and early checks
Before anyone talks about solutions, it helps to confirm the pattern and severity of movement.
Homeowners can do a few sensible things early:
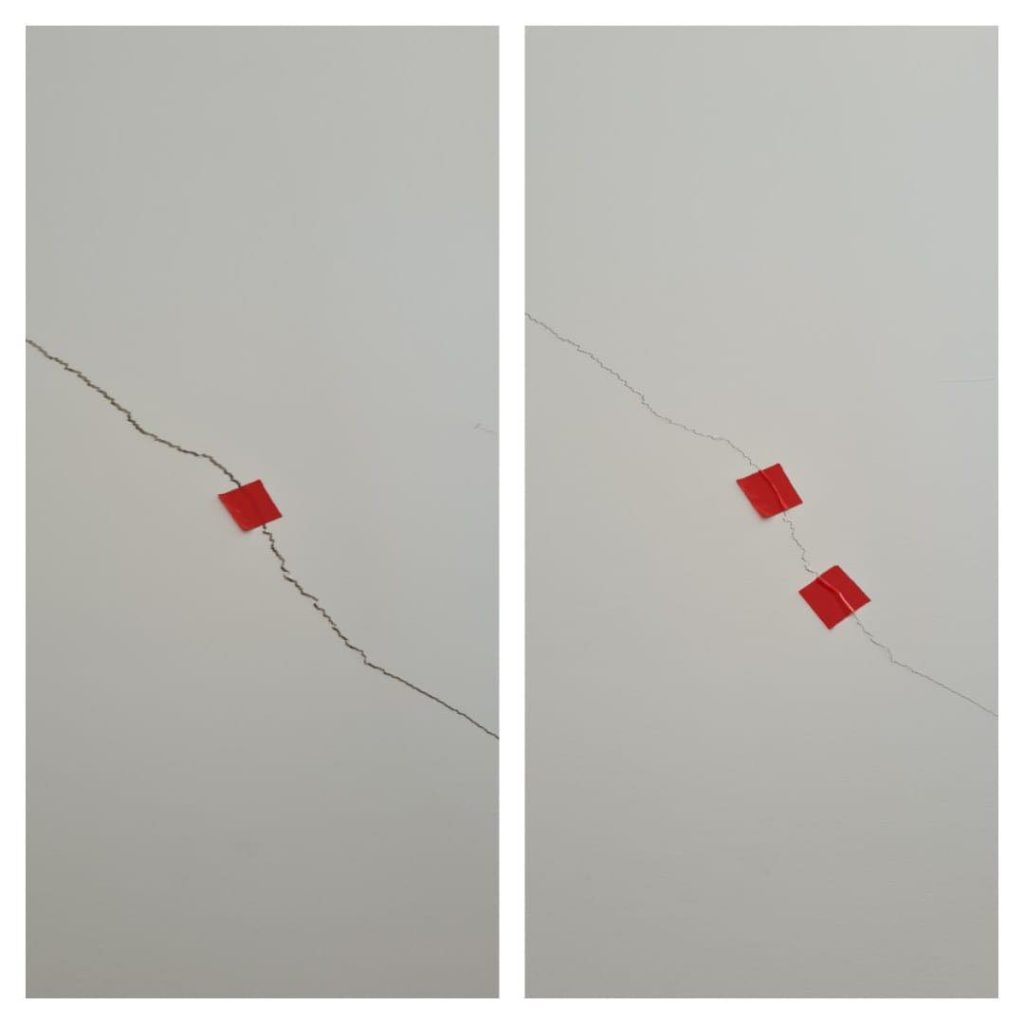
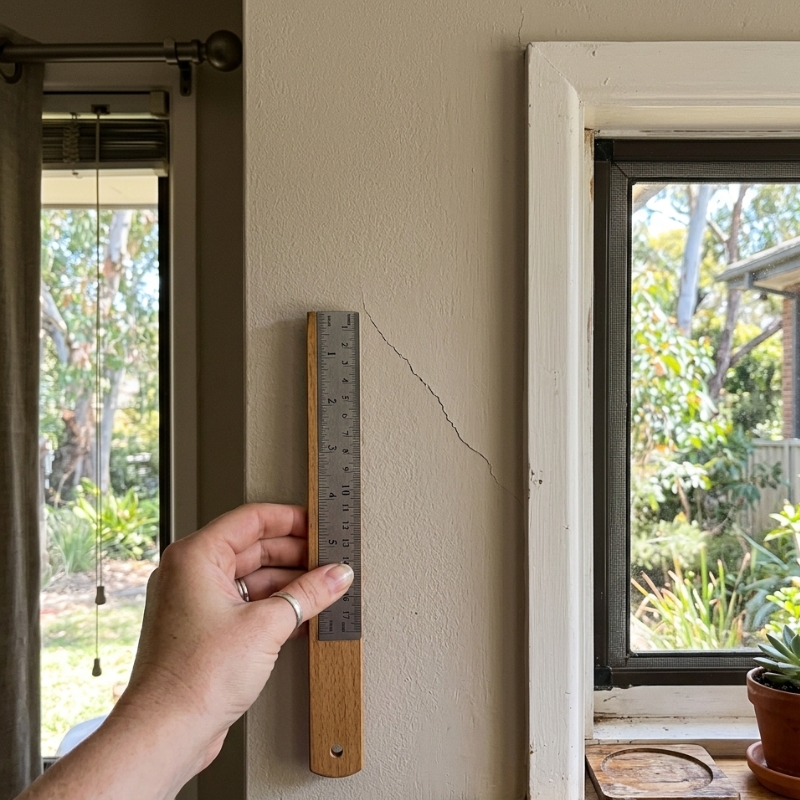
• Take dated photos of cracks (include a coin or ruler for scale)
• Note which doors/windows stick and when (after rain, during heat, seasonally)
• Check if cracks open/close over weeks
• Look for obvious water issues: overflowing downpipes, poor surface drainage, damp subfloor areas, leaking taps or wet patches
• If safe to access, check the subfloor for soft soil, pooling water, or displaced stumps/piers (where relevant)
This isn’t about diagnosing it yourself. It’s about capturing a baseline so later decisions are based on evidence, not guesswork.
Q&A: Should you patch cracks before an inspection?
If cracks are actively changing, patching too early can hide useful clues. It’s usually better to document first, then repair finishes after the structure is stabilised and movement is understood.
Stage 2: assessment and investigation (the “why” behind the movement)
Underpinning decisions are only as good as the investigation behind them. Depending on the situation, this phase may include:
• A structural assessment (often by an engineer)
• Reviewing the home’s construction type (brick veneer, double brick, weatherboard, slab-on-ground, suspended floors)
• Site observations: drainage, downpipes, slope, trees, retaining walls, recent landscaping, adjacent works
• Crack mapping and level surveys (to understand differential movement)
• Where needed, geotechnical input or soil information (especially on reactive sites)
In many Australian conditions, water management is a major part of the story. Reactive clays can shrink in dry periods and swell when moisture returns, creating seasonal cycles of movement. Plumbing leaks or poor stormwater discharge can intensify the problem.
Q&A: Is underpinning always needed if there are cracks?
No. Some cracks are cosmetic (especially hairline plaster cracking), and some movement can be historic or seasonal without ongoing structural risk. The key is whether movement is active, differential, and affecting structural performance or safety.
Stage 3: the engineering plan (what will be done, and where)
If underpinning is recommended, the next step is usually a design that answers:
• Which parts of the structure need additional support
• What method is appropriate for the soil and access constraints
• How loads will be transferred (and how temporary support will be handled)
• Whether any re-levelling is planned or whether stabilisation alone is the aim
• Staging/sequencing (critical for safety and performance)
This is also where practical constraints get addressed:
• Access around the perimeter (tight side passages, fences, landscaping)
• Proximity to services (stormwater, sewer, gas, electrical)
• Nearby structures (retaining walls, sheds, neighbour’s footings)
• Internal sensitivity (tile floors, brittle finishes, older masonry)
In short, this is where “a solution” becomes “a plan”.
What happens on-site during underpinning?
This is the part homeowners usually want to picture: what the crew actually does day-to-day, and why it’s done in segments.
While the exact steps vary by method, the underlying idea is consistent: introduce new support safely, without destabilising what’s already there.
Stage 4: site setup and safety controls
Common early steps include:
• Marking out where work will occur
• Locating services (sometimes with scans or existing plans)
• Protecting nearby areas (paths, gardens, internal surfaces as needed)
• Establishing safe access and storage
• Confirming staging to avoid undermining key load points
If you’ve ever wondered why crews don’t just dig a continuous trench along the whole wall, it’s because removing support too broadly, too quickly, can trigger sudden movement or damage. Staging is a risk control.
Q&A: Do you have to move out while underpinning is happening?
Often, people can remain in the home depending on the scope, method, access, and safety considerations—but it varies. Noise, vibration, and restricted access are common. For extensive works, especially where re-levelling is involved, or internal areas are affected, temporary relocation may be recommended. It’s a project-by-project decision.
Stage 5: staged excavation or installation (the “in pieces” approach)
For traditional mass concrete underpinning, the work is often performed in “pins” (small sections), typically alternating so the house remains supported. The sequence may look like:
• Excavate the first pin to the specified depth and dimensions
• Prepare the base and sides (clean, firm bearing, correct geometry)
• Place reinforcement (if required)
• Pour concrete
• Allow it to gain sufficient strength
• Move to the next pin according to the staging plan
For pile-based systems (such as screw piles or bored piers), excavation may be reduced, but access and installation equipment become the key factors. The system is installed at designed locations, then connected to the structure through brackets, beams, or underpinning beams, depending on the design.
Stage 6: load transfer (how the house “starts using” the new support)
Installing concrete or piles is not the whole story—the load has to be transferred correctly.
Depending on the system and design intent, load transfer can involve:
• Packing/shimming to ensure contact between the new support and the existing footing
• Installing brackets or caps to connect piles to the structure
• In some cases, controlled jacking where re-levelling is part of the plan (done cautiously and incrementally)
This phase is where experience and sequencing matter. Too aggressive an approach can damage brittle finishes, crack masonry, or create unintended stress concentrations.
Q&A: Can underpinning make existing cracks worse at first?
It can happen. Any work that changes how loads are carried can cause minor readjustments. Good staging and controlled load transfer reduce the risk, but some cosmetic cracking may occur—especially in older homes or those with rigid finishes.
Stage 7: curing, verification, and “making good”
With concrete underpinning, curing time is part of the process. With pile systems, installation is often faster, but connection and verification steps still matter.
“Making good” varies widely:
• Reinstating excavated areas
• Repairing paths, garden edges, or sections of paving (where affected)
• Tidying spoil and restoring access ways
• Confirming drainage paths aren’t compromised
• Documenting what was done (photos, locations, notes)
A key point: structural stabilisation and cosmetic repairs aren’t the same task. It’s common to separate them so you’re not repainting and patching while movement is still settling or while moisture issues are unresolved.
Common underpinning methods you might hear about in Australia
The best method depends on soil behaviour, access, loads, and what you’re trying to achieve (stabilisation vs re-levelling).
Mass concrete underpinning (traditional pins)
This is the classic staged pin approach:
• Localised excavations under/adjacent to existing footings
• Concrete poured to form deeper, stronger support points
• Often effective where access is workable, and the design suits the footing type
Typical considerations:
• More excavation and spoil handling
• Time required for staging and curing
• Potential impacts on gardens/paths due to access
Screw piles or steel piles (depth-focused support)
These systems use steel piles installed to a designed depth, often to reach more stable strata.
• Can reduce the amount of open excavation
• Helpful where deeper support is needed
• Installation equipment access can be the limiting factor
Bored piers / micropiles (site-specific solutions)
Where soil conditions, loads, or access require it, bored piers or smaller-diameter piled systems may be used. These are more engineered solutions and can be tailored to constraints.
Resin injection and ground improvement (not always “underpinning”)
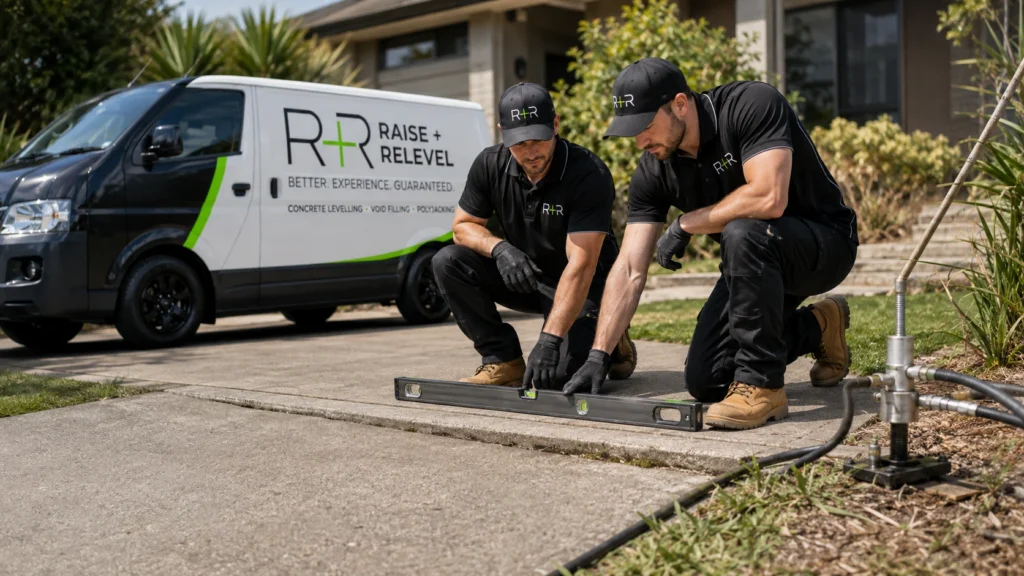
Resin injection is sometimes discussed in the same breath as underpinning, but it’s not the same mechanism. In some cases, it’s used to improve ground performance under slabs or fill voids, depending on the problem being solved.
Q&A: Which method is “best”?
There isn’t a universal best. The best approach is the one that matches your ground conditions, structure type, access constraints, and objectives. Method selection is a design decision—not a marketing preference.
What can homeowners do to support a better result?
Underpinning is often only one piece of the puzzle. If the underlying cause is still present, movement can continue even after structural works.
Water management: the quiet hero of foundation stability
A large portion of foundation movement issues relates to moisture changes around the home. Practical, non-invasive steps that often matter:
• Ensure gutters and downpipes discharge away from footings
• Fix leaking plumbing promptly (including under-slab leaks)
• Maintain consistent moisture around reactive sites (avoid dramatic wet/dry swings near one side of the house)
• Keep surface drainage grading away from the building
• Be cautious with garden beds hard against walls if they concentrate moisture
For a broader homeowner-focused overview of how moisture and site conditions can contribute to structural damage, this QBCC guide to preventing structural damage is a useful reference.
Trees, roots, and landscaping changes
In many Australian suburbs, mature trees can influence moisture conditions. The goal isn’t “remove all trees”—it’s to understand whether a particular tree, location, and soil type are contributing to differential movement.
Any decisions around trees should be made carefully and, where necessary, with professional advice. Sudden changes to moisture conditions can sometimes cause as many issues as the tree itself.
Q&A: Should you re-do drainage before underpinning?
If drainage or plumbing leaks are major drivers, addressing them early can be important. In some cases, stabilising first is necessary for safety or to stop deterioration. Often it’s a coordinated plan: control moisture + stabilise structure + repair finishes.
A homeowner-friendly walkthrough: what a “typical” project can feel like
Every site is different, but the lived experience often includes:
• A period of inspections, measurements, and planning
• Clear marking-out around the home
• Noisy, dusty stages during excavation or pile installation
• Restricted access to certain side passages or yard areas
• Intermittent work as staging progresses
• A “structural completion” point where the support work is done
• A later phase where cosmetic repairs and touch-ups make sense
If you want to understand how this kind of work is typically planned and sequenced, Raise & Relevel’s overview of the underpinning process can help you visualise how stabilisation work is approached without jumping straight to cosmetic patching.
What happens after underpinning is finished?
Finishing the structural work isn’t the end—it’s the point where you can make smarter decisions about repairs and prevention.
Post-work monitoring
Depending on the site and design, you may be advised to:
• Monitor cracks over time (some may close slightly, others may remain visible but stable)
• Keep an eye on doors and windows through seasonal changes
• Re-check drainage performance after heavy rain
• Avoid sudden landscaping changes that alter moisture patterns near the footings
Cosmetic repairs (the “right time” to patch and paint)
Once stabilisation is achieved and underlying moisture/drainage issues are addressed, repairs may include:
• Plaster patching and repainting
• Re-setting cornices
• Re-aligning doors
• Tile repairs (where needed)
Rushing cosmetic repairs before the structure is stable is one of the most common frustrations homeowners report.
Q&A: Will underpinning stop cracks from ever returning?
It can significantly reduce structural movement when it addresses the underlying support problem. But if moisture conditions remain uncontrolled (leaks, poor drainage, seasonal extremes), movement can still occur. Think of underpinning as part of a system: ground + water + structure.
Underpinning vs re-levelling: related, but not identical
People often use “underpinning” as a catch-all term for any foundation repair. In practice:
• Underpinning is about improving support and load transfer
• Re-levelling is about adjusting levels (which may or may not be part of the plan)
Some projects include controlled re-levelling; others focus on stabilisation first, then recommend separate work for finishes. If you’re trying to decide what the project is truly aiming to achieve, it helps to ask: “Is the objective stabilisation, re-levelling, or both?”
Before spending money on patching and painting, it’s worth understanding whether foundation stabilisation is needed to reduce ongoing movement and protect future repairs.
Final FAQ
What’s the very first step if you suspect foundation movement?
Document what you’re seeing (photos, notes on doors/floors), check obvious water issues, and arrange a proper assessment so the cause is identified before anyone proposes a solution.
Is it only an underpinning for old houses?
No. Older homes can have shallow footings or aged drainage, but newer homes can also move—especially on reactive soils or where site drainage, plumbing leaks, or landscaping changes affect moisture conditions.
Why is underpinning done in stages?
Staging reduces risk. Removing support too broadly can trigger sudden movement or damage. Working in alternating sections helps maintain stability while new support elements are added.
Is underpinning always concrete?
No. Concrete underpinning is one method. Depending on the site, designers may use piles, piers, brackets, beams, or other engineered approaches.
Does underpinning fix the cause of movement?
Underpinning addresses the structural support problem. The underlying drivers (like water management, drainage, leaks, or soil moisture changes) often need attention too, or movement can continue.
When should you repair cracks—before or after?
Usually, after stabilisation and after moisture/drainage issues are addressed. Otherwise, repairs can re-crack and become an ongoing cycle.
Do you need approvals?
Sometimes. Requirements vary by state, council, and the nature of the work. It’s sensible to confirm what applies locally as part of the planning phase.
How do you know if the work “worked”?
Success is typically measured by stabilisation: reduced ongoing movement, fewer changes in cracks/levels over time, and improved performance of doors/windows—especially through seasonal changes.